Necessities
- One or more screens with an HDMI input to which the mediaplayer can be connected. If you want to control multiple screens with 1 mediaplayer (you play 1 program synchronously) then video distribution equipment (HDMI distributors, cabling and possibly extenders) is also necessary.
- An electrical outlet with 24-hour power (for nightly updates), within 1 meter of the screen or the mounting point of the mediaplayer. *
- A network connection with internet access within 1 meter from the installation point of the mediaplayer. A fixed network connection gives the least chance of interference and is preferable to a WIFI connection.
- Enough space behind the screen to place the mediaplayer. Dimensions: 110x70x30 mm (length x width x depth)
- Optional: A USB keyboard and mouse at the time of installation. This is necessary if you want to make adjustments to the basic settings of the mediaplayer, such as network settings, WiFi or video resolution.
Contents of the installation package
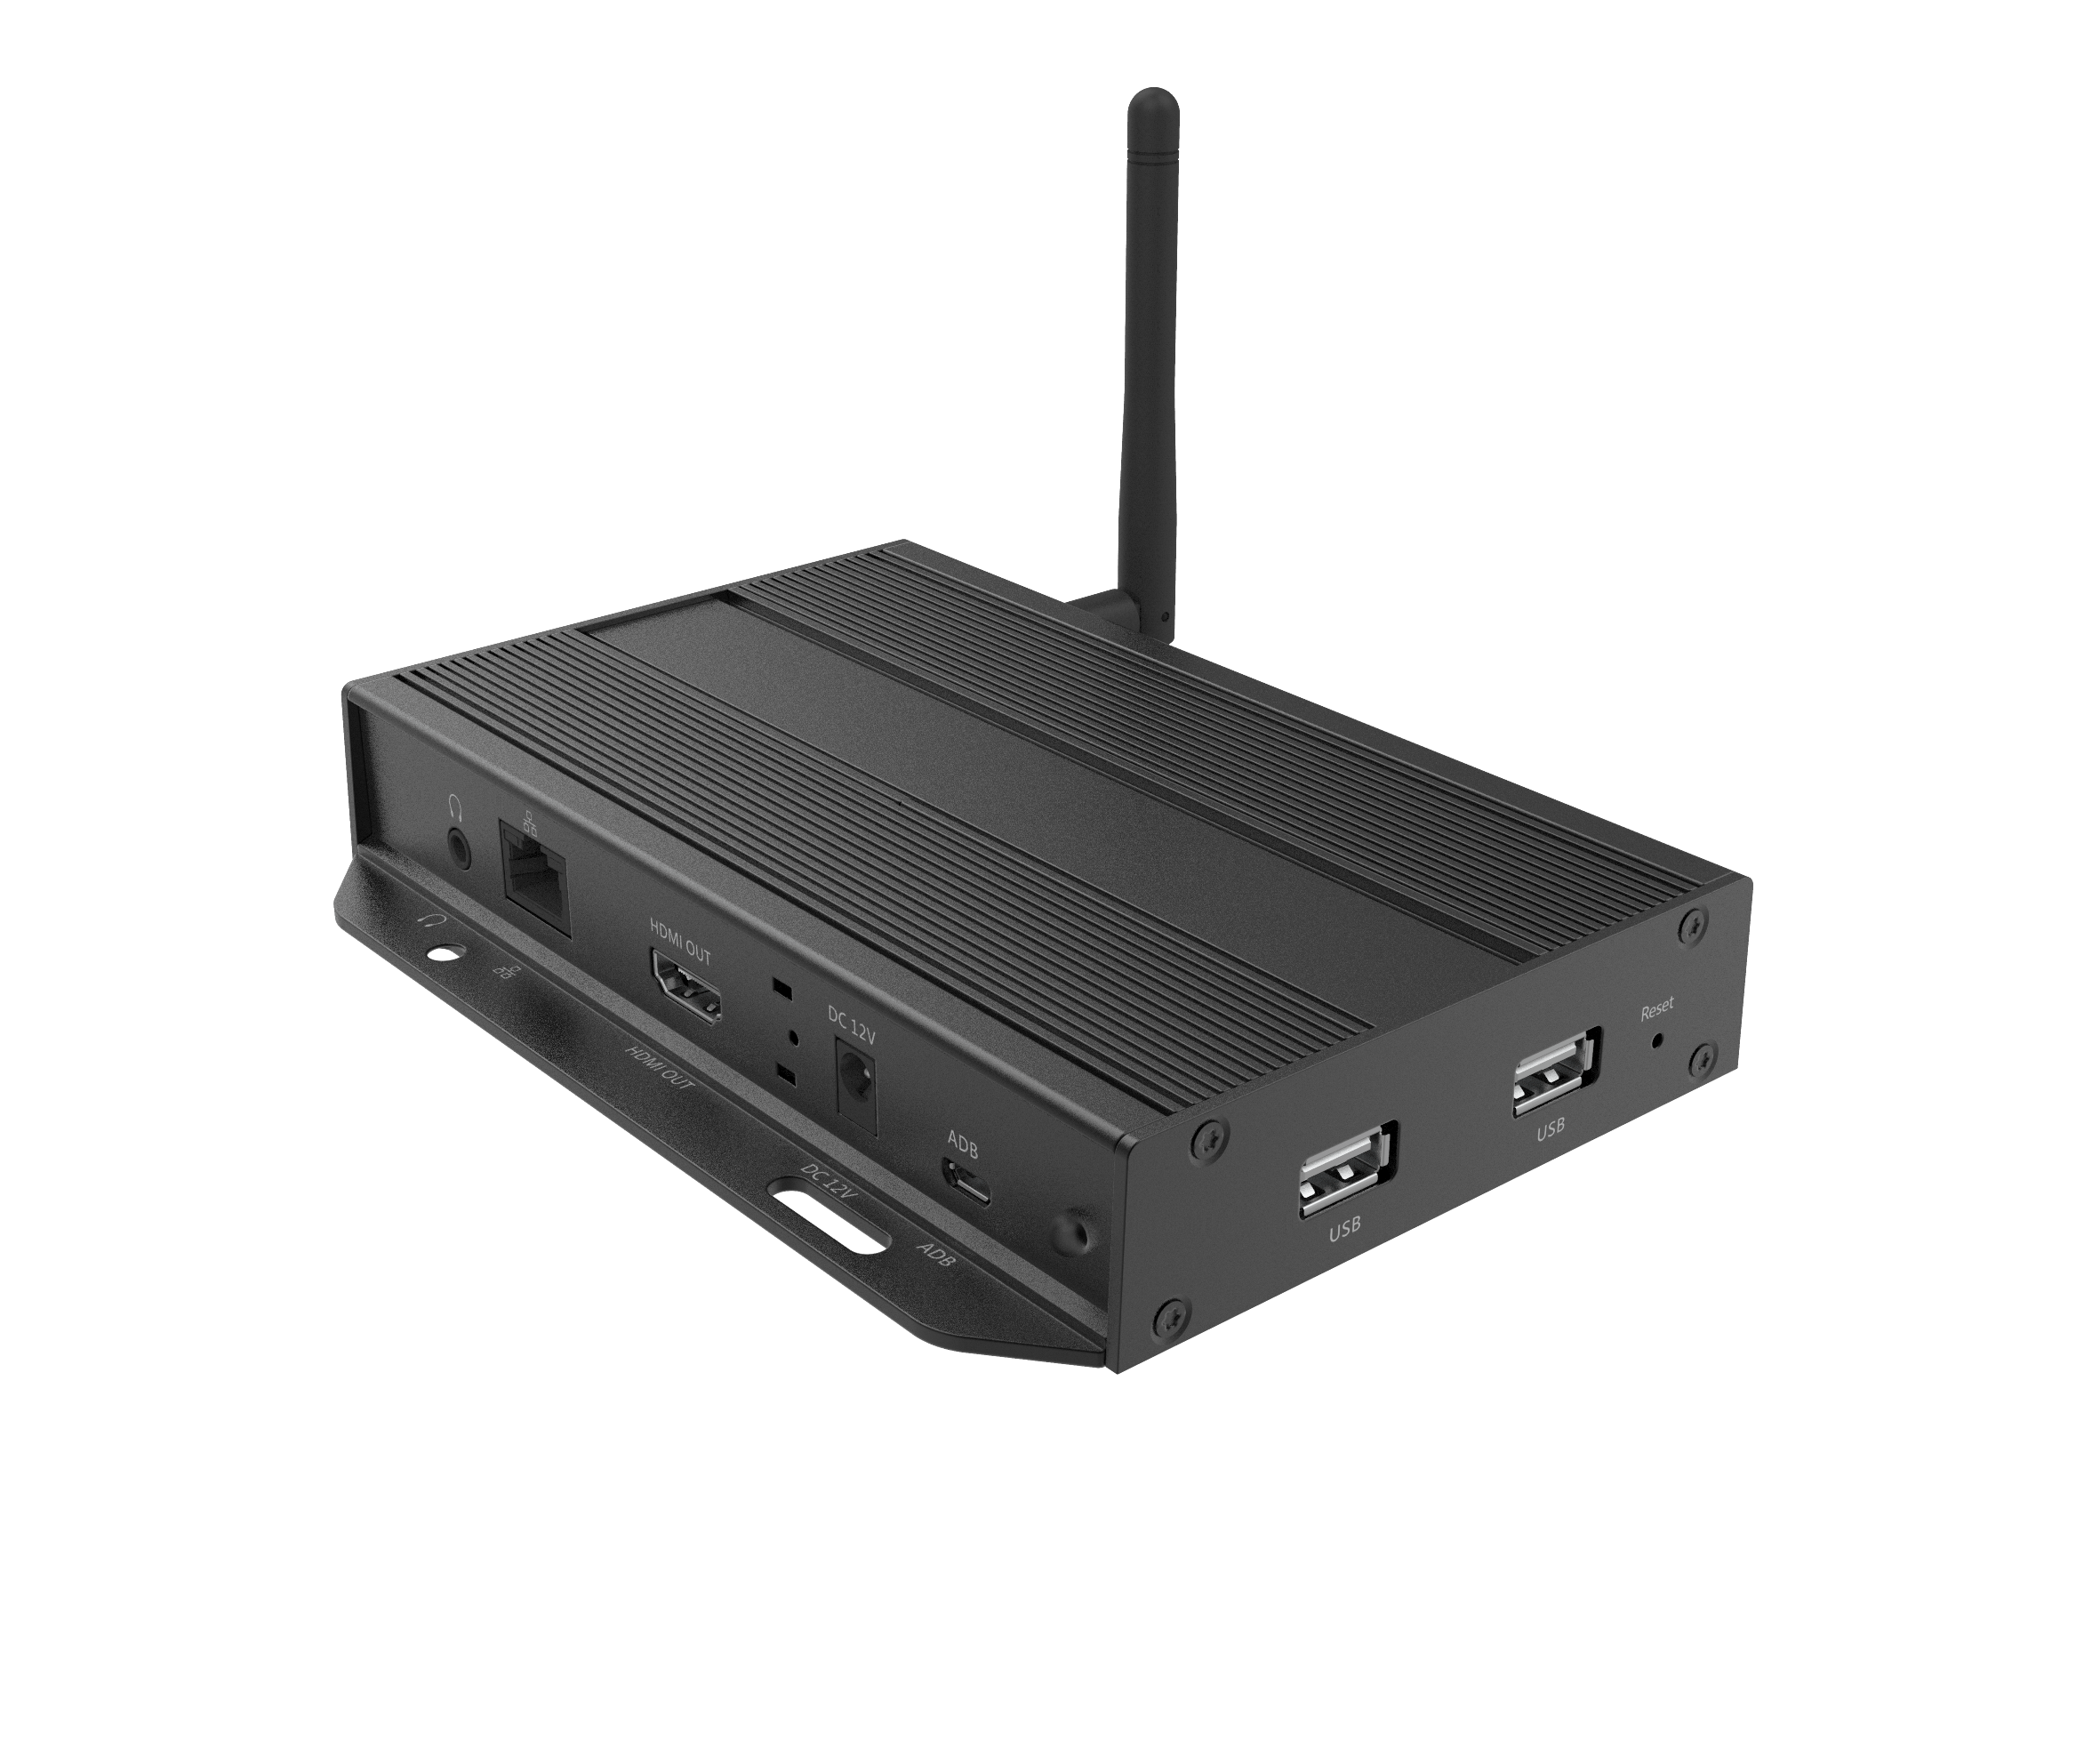
- mediaplayer
- 12V Adaptor
- Network cable (2 m)
- HDMI cable 2 meter
- Wireless antenna
- 2 strips of double-sided self-adhesive Velcro
- wall mounting plate with mounting screws for mediaplayer
TIP:
If you want to use the screen in portrait orientation (upright), please refer to the screen installation manual first. Some brands are not suitable for hanging in portrait. If the supplier allows portrait, you must turn the screen to which the mediaplayer is connected 90 degrees. In most cases this is clockwise, but there are some exceptions. Consult the supplier's installation manual or test the orientation with a connected mediaplayer before installing the screen.
Placement of the mediaplayer
Decide where you want to install the mediaplayer. You have the following options for this:
- Directly behind the screen by means of the supplied double Velcro strips.
- Screw on the wall near the screen using the supplied wall mounting plate. The included HDMI cable is 2 m long and can be used if necessary. Screws, plugs for the wall or a longer HDMI cable can be purchased in-house. Use of HDMI cables longer than 10 meters is not recommended.
- Plug the mediaplayer directly into the HDMI input of the screen. In this case, secure the network and power cables so that the HDMI input cannot be damaged when the cables are pulled.
If the player is placed further than 100 cm from the HDMI input of the screen, a longer HDMI cable must be ordered or purchased independently. Please note that this must be a cable of the “male-female” type, so an HDMI extension cable. A standard HDMI cable does not fit in the player.
If the distance between the socket and the installation location of the mediaplayer is more than 1 meter, a longer USB cable must be ordered or purchased independently.
Installation of the mediaplayer
- Place the mediaplayer on the back of the screen or mount it on the wall
- Connect the network cable to the Internet connection and to the network port (LAN) of the mediaplayer
- Connect the HDMI cable to the HDMI output of the mediaplayer and a free HDMI input of the screen.
- Connect a Network cable to the player ( for WIFI see Network- en WiFi settings)
- Switch on the screen and select the HDMI input to which your mediaplayer has connected according to the manual of the screen. Usually this is by means of the remote control by clicking the "input" or "source" button.
- Connect the power adapter to the wall socket and to the mediaplayer (DC 12V). After about 30 seconds a short start screen appears:
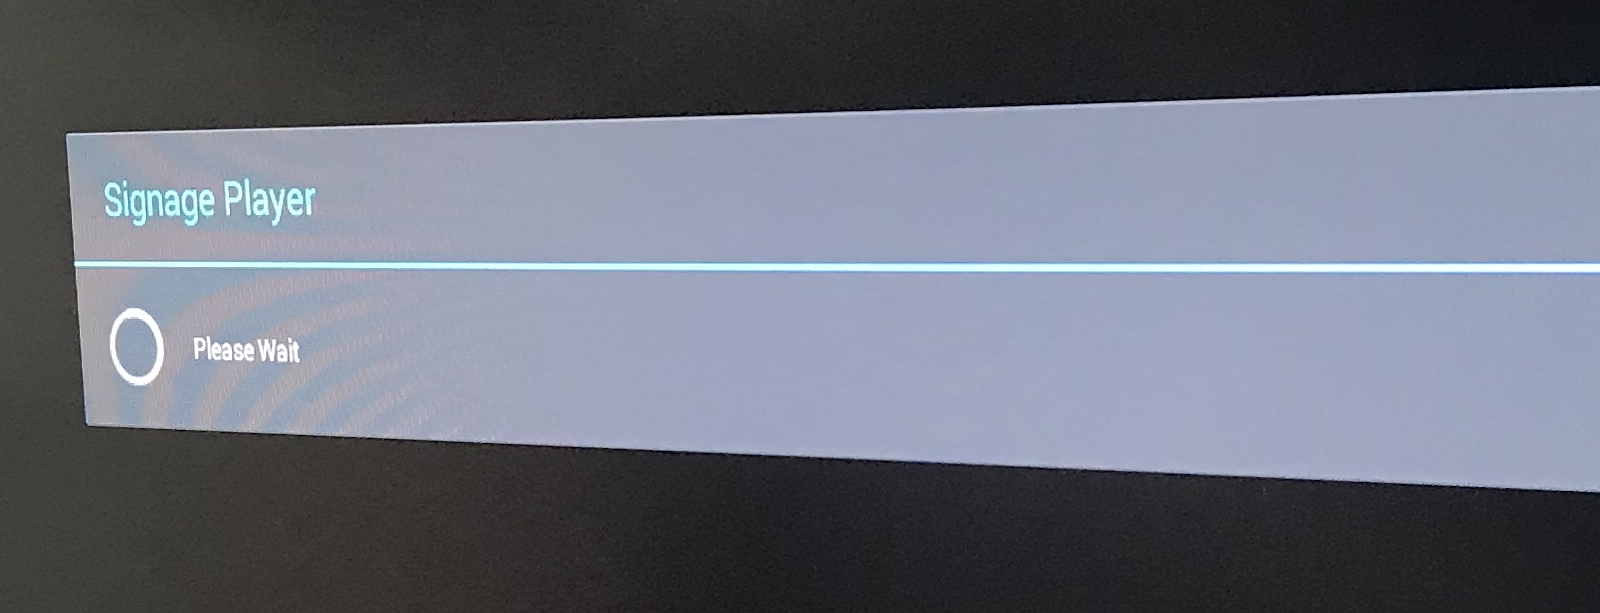
- After the start-up screen, the content program is started.
If the player does not connect on the fixed network settings, please check the cabling first and then consult the network administrator
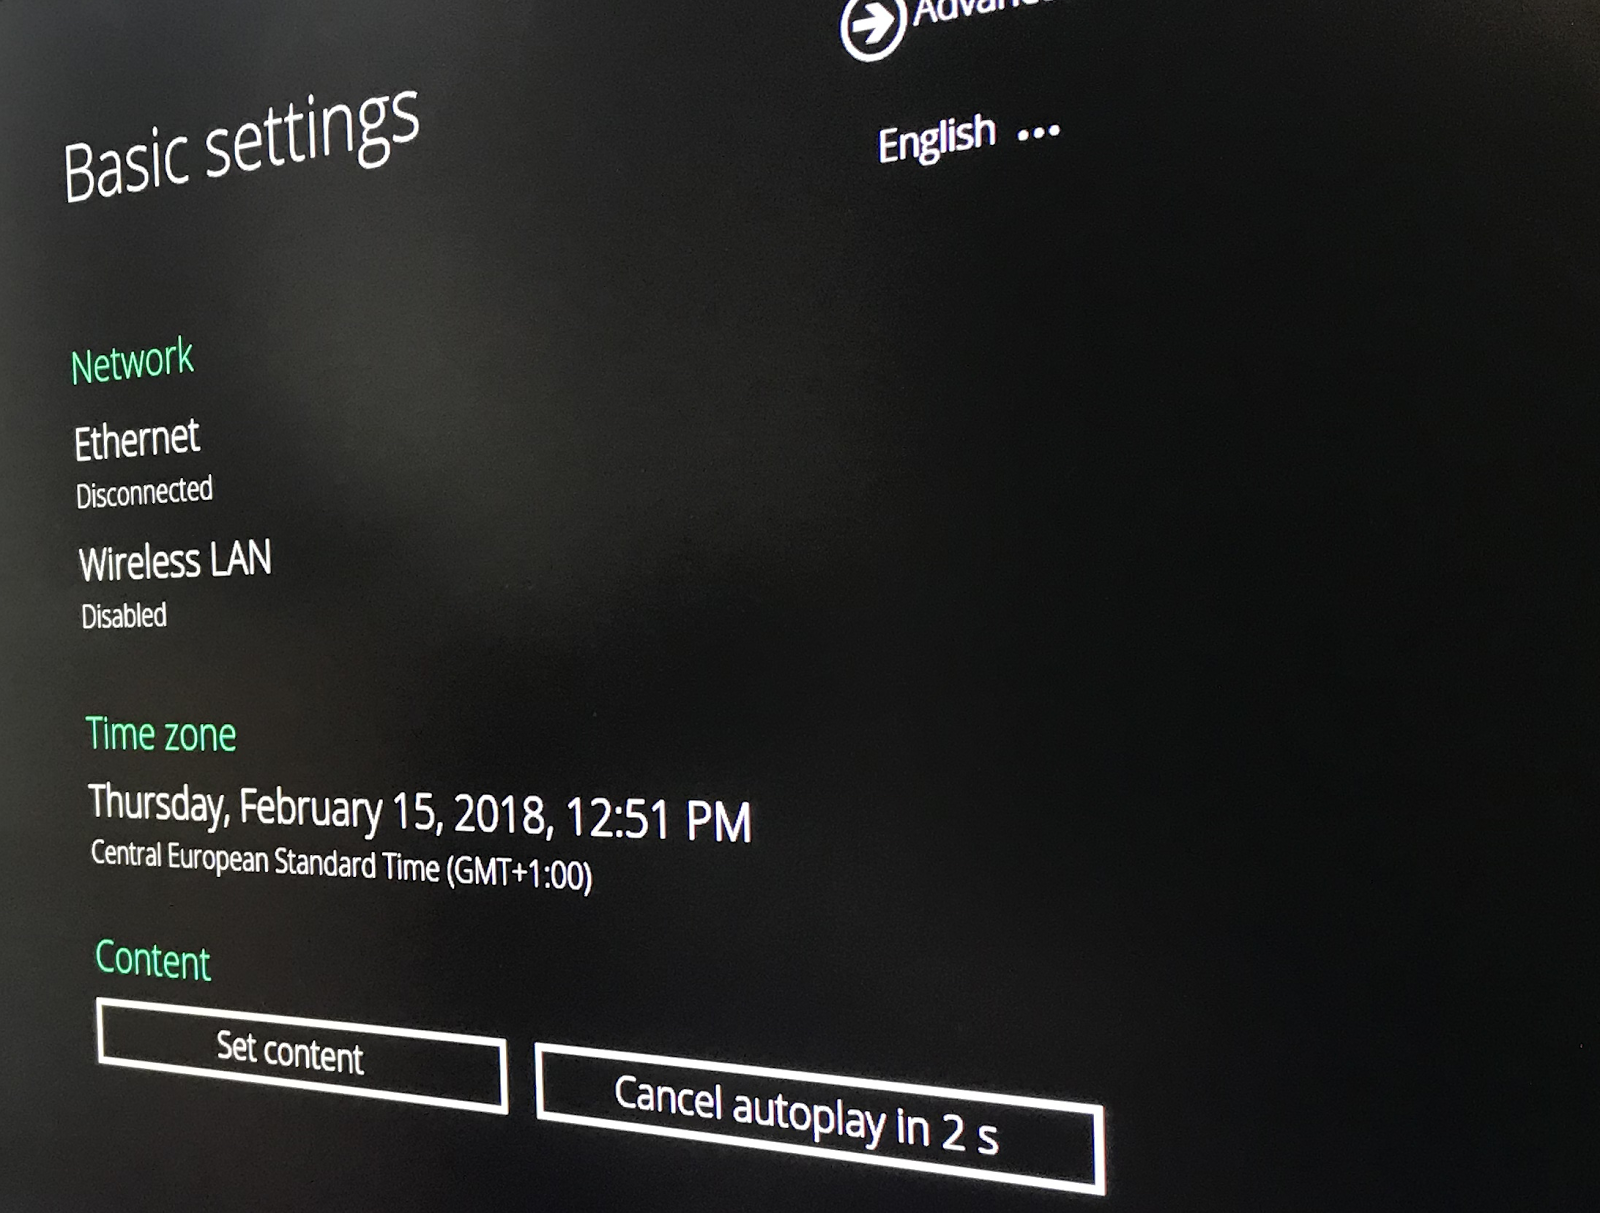
Network settings
The XMP-7500 is supplied as standard for wired connection to a network with automatic IP assignment (DHCP). If the player is connected to a WIFI network or if the wired network requires a fixed IP configuration, this can be set in the configuration menu of the mediaplayer.
- A USB mouse
- a USB keyboard (optional)
Access to the configuration menu
- Make sure the monitor is connected and visible from the mediaplayer.
- Close the mouse and if necessary. the keyboard to the USB ports of the mediaplayer.
- Start up the mediaplayer by connecting the power adapter.
- After about 30 seconds you will get the option to go to the configuration menu of the mediaplayer.
- Select and click “cancel autoplay” with the mouse. Then click on "advanced" to change the settings:
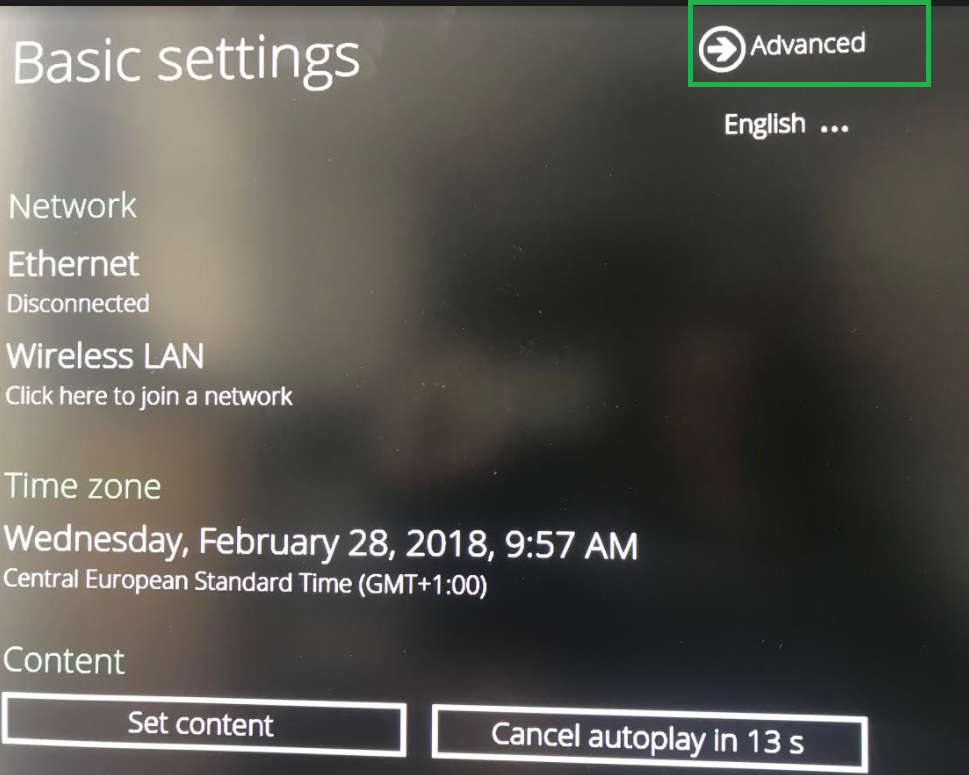
Note: If the player has already been started up, it is also possible to enter the configuration menu by placing the cursor in a corner of the screen and holding down the left mouse button for 15 seconds.
Click on the pause icon
- Network and other mediaplayer settings can be adjusted in the configuration menu..
Set up WIFI
With a fixed installation, it is recommended to connect the mediaplayer via a wired network. A fixed connection gives the least chance of disruptions or problems with updates. If there is no wired network, and there is a WiFi network available with sufficient signal strength, the player can be connected to this:
- Click on advanced
- Go to Network> Wireless Lan. First turn off "Ethernet on" by selecting the checkmark:
- The available WIFI networks are shown:
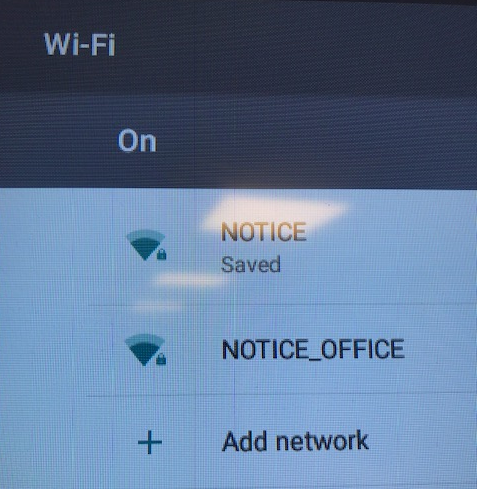
- Select the network that you want to connect to.

- If you have entered the password correctly, "connected" will appear after a while:
- You can now leave the menu with the return arrow at the bottom:
- The player returns to the initial screen of the configuration menu. If you do nothing, it will start playing again after 15 seconds.
Network settings changes: IP configuration
If the wired network on location requires this, a fixed IP configuration can be set in the mediaplayer. First consult the network administrator. The player is set to automatic configuration (DHCP) by default, which will suffice in most cases. You can enter fixed IP settings as follows:
- Advanced Menu click on network
- Open Ethernet >static IP settings, select > Modify network > advanced options> IP Settings”and click op “static”
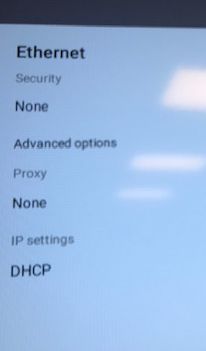
- Enter the data that you have received from the network administrator.
Note for netmask: For network prefix length for 255.255.255.0 type 24. for other numbers see the link below
Network settings changes: set up proxy server
Click on proxy and choose Manual
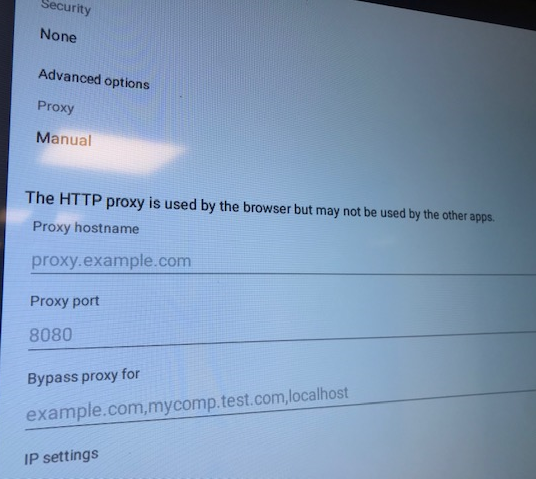
- Enter the data that you have received from the network administrator
- You can now leave the menu with the return arrow at the bottom:
- The player returns to the initial screen of the configuration menu. If you do nothing, it will start playing again after 15 seconds.
If the player does not connect to the fixed network settings, first check the cabling and then consult the network administrator.
Resolving problems
- Problems with the network: If the player does not come online in your digital signage account, there may be something wrong with a network. In this case, check whether you can connect to the internet with another device (e.g. a laptop).
- If not, contact the network administrator.
- If a laptop is allowed to connect to the internet, but the mediaplayer does not come online, you can contact the supplier
- Problems with the display: If the screen does not display the content completely or is distorted, check on the basis of the manual of the screen that the aspect ratio is at 16: 9 or is on full screen. If the screen does not accept a full HD signal, the mediaplayer can be set to a lower resolution. Please contact the service center for this.