
Support Center » xmp 6250 media player installation guide
XMP-6250 Media Player Installation Guide
Simplify the setup of your XMP-6250 media player by following our detailed installation manual.
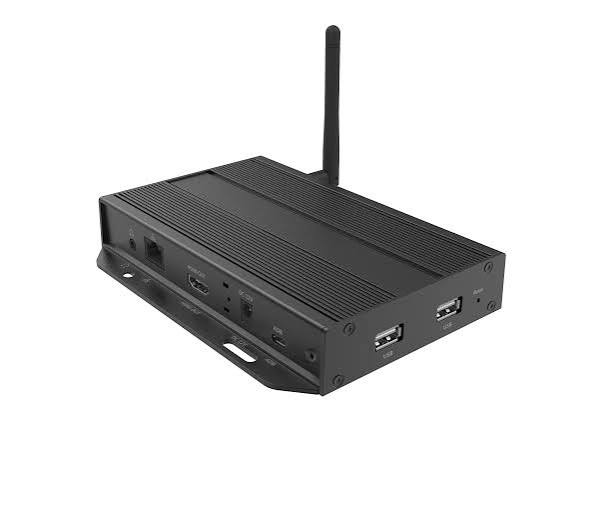
Necessities
- One or more screens with an HDMI input to which the media player can be connected. If you want to control multiple screens with 1 media player (you play 1 program synchronously) then video distribution equipment (HDMI distributors, cabling and possibly extenders) is also necessary.
- An electrical outlet with 24-hour power (for nightly updates), within 1 meter of the screen or the mounting point of the media player. *
- A network connection with internet access within 1 meter from the installation point of the media player. A fixed network connection gives the least chance of interference and is preferable to a WIFI connection.
- Enough space behind the screen to place the media player. Dimensions: 110x70x30 mm (length x width x depth)
- Optional: A USB keyboard and mouse at the time of installation. This is necessary if you want to make adjustments to the basic settings of the media player, such as network settings, WiFi or video resolution.
Contents of the installation package
- Media player
- 5VDC USB power adapter
- Network cable (2 m)
- HDMI cables 2 meter
- Wireless antenna
- 2 strips of double-sided self-adhesive Velcro
- wall mounting plate with mounting screws for media player
Portrait arrangement
If you want to use the screen in portrait orientation (upright), please refer to the screen installation manual first. Some brands are not suitable for hanging in portrait. If the supplier allows portrait, you must turn the screen to which the media player is connected 90 degrees. In most cases this is clockwise, but there are some exceptions. Consult the supplier’s installation manual or test the orientation with a connected media player before installing the screen.
Placement of the media player
Decide where you want to install the media player. You have the following options for this:
- Directly behind the screen by means of the supplied double Velcro strips.
- Screw on the wall near the screen using the supplied wall mounting plate. The included HDMI cables are 35 and 100 cm long and can both be used if necessary. Screws, plugs for the wall or a longer HDMI cable can be purchased in-house. Use of HDMI cables longer than 10 meters is not recommended.
- Plug the media player directly into the HDMI input of the screen. In this case, secure the network and power cables so that the HDMI input cannot be damaged when the cables are pulled.
If the player is placed further than 100 cm from the HDMI input of the screen, a longer HDMI cable must be ordered or purchased independently. Please note that this must be a cable of the “male-female” type, so an HDMI extension cable. A standard HDMI cable does not fit in the player.
If the distance between the socket and the installation location of the media player is more than 1 meter, a longer USB cable must be ordered or purchased independently.
.
Installation of the media player
- Place the media player on the back of the screen or mount it on the wall
- Connect the network cable to the Internet connection and to the network port (LAN) of the media player
- Connect the HDMI cable to the HDMI output of the media player and a free HDMI input of the screen.
- Connect a Network cable to the player ( for WIFI see Network- en WiFi settings)
- Switch on the screen and select the HDMI input to which your media player has connected according to the manual of the screen. Usually this is by means of the remote control by clicking the “input” or “source” button.
- Connect the power adapter to the wall socket and to the media player (DC 12V). After about 30 seconds a short start screen appears:
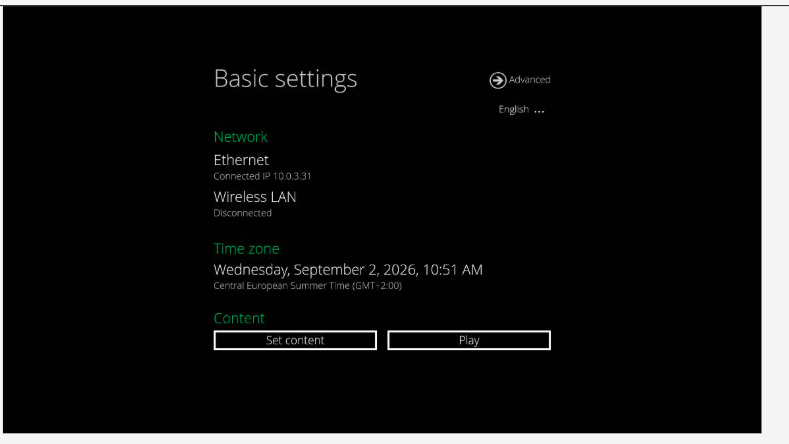

After the startup screen, the content playlist will start automatically.
NB: If you have received a personal login for your digital signage account and are installing the media player, the startup screen will be displayed if the player has not yet been registered.
Once the player has been registered, you can view the hardware in your digital signage account and create playlists from there. For an explanation of how to get started with your account, visit:
https://help.cms-ds.com/en/ and search for “Getting Started”.
Troubleshooting
1. Network issues
If the player does not come online in your digital signage account, there may be a network connectivity issue. In this case, check whether you can connect to the internet using another device, such as a laptop.
If you cannot connect to the internet: contact your network administrator.
If you can connect to the internet with a laptop, but the media player does not come online: contact the Service Center at 020-6842212 or servicecenter@easyscreen.tv.
2. Display issues
If the screen does not display the content correctly, or if the content appears distorted or does not fill the screen, check the screen’s manual to make sure the aspect ratio is set to 16:9 or Full Screen.
If the screen does not support a Full HD signal, the media player can be configured to use a lower resolution. Please contact the Service Center for assistance.
Powering the media player via USB
If the screen has a USB port that can supply 5V / 2A, the media player can also be powered directly from the screen.
Many screens have a USB port, but it is often not intended to power an external device. Please check the screen’s manual to confirm whether the USB port can provide sufficient power. If in doubt, we recommend using the external power adapter.